I got my LD some time ago and after riding it for a bit came to decide that it needed more go power to make it viable for street, and more exactly for being able to keep up with traffic, take off at green lights, climb hills, carry passengers, and just generally to be more responsive in road society.
The first thing I did was get advice on re-designing the port timing program for the top end. Apparently, piston-port design in the 50s was not much more than what it took to make it go at all, and so the standard LD porting is it's own worst enemy. The re-design, developed at West Coast Lambretta Works and known as the XP, proportions the port timing durations more effectively, resulting in an increase both in torque and rev range, These increases are evident even with the standard carb and exhaust. The XP program consists of cylinder length machining, port work, and head re-profileing. If done in conjunction with a motor rebuild, then a crank rebuild using a TV III rod with roller bearing small end is adviseable to ensure that the big end will be reliable under the increased loads. The roller small end also allows the use of the 3% oil/gas mix for cleaner burn and less smoke than the standard LD 6% mix. After it's all back together and running, you should get a couple sizes bigger main jet find out what size your motor now needs, usually about a #80.
Performance-wise, the XP will take off faster than a standard motor when the light turns green. The bottom of the power band has raised slightly, so you need to get the revs up a little higher to take off. You'll stay in each gear longer as the new port scheme allows the motor to rev higher. Revving higher before shifting means that when you drop into the next gear, you drop into the powerband (instead of below it, like before) allowing you to accelerate right out of the bottom of the next gear (instead of waiting until the motor gets up to a decent rev to develop any power, like before). With standard carb and exhaust, 1st gear will get up to about 20, 2nd gear will get up to 30-35, 3rd will get you up to 45-50, crouching will hit 50 easy. Overall performance is comparable to a LI 150, though the LI will exceed in top speed by a little. If you have to go up a hill, you can stay in 2nd and go up at about 30, or on medium hills you can rev higher, put it into 3rd, and it will hold 35 or so. If you crouch, it will go up faster.
I drove this layout for quite a while, then went further with the big carb and muffler just to see how it would do.
Putting the Mikuni 24 flat slide project together takes alot more work. Everything is custom. Start by buying the carb, rubber boot, and zebra (narrow profile) clamps.
First, make a manifold. Measure the ID and OD of the Mikuni mounting spigot, where it goes into the rubber mounting boot. Get a piece of aluminum tube about an inch long machined to those ID and OD, making sure to include the groove for the corresponding circumferential ridge molded into the rubber boot. Then from a standard LD 150 manifold saw off the 3/4 inch or so of turned diameter where the standard carb usually slides on. Set the manifold project aside for now.
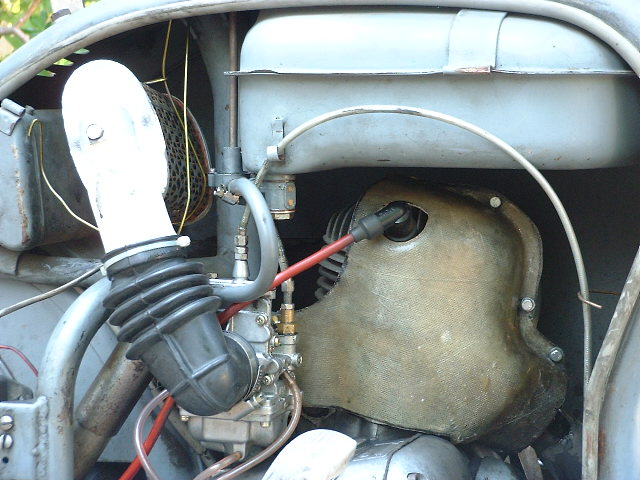
Next, make a fibreglass cooling shroud half because the hole in it for the manifold and boot to fit through need to be bigger than standard, don't cut up a valuable original part. Bolt on your new shroud half, and bolt on the sawed-off manifold to the cylinder. Mock up together the Mikuni, the boot, and the new aluminum manifold stub. Hold this assembly in place above it's desired position. This allows you to decide how long the new manifold stub should be so that the rubber boot ends up about half way through the shroud hole, with one band clamp inside and the other one outside of the shroud. Another goal is to mount the carb as closely inboard as you can while clearing everything, so as to allow the most room between the carb and side panel for fitting an air hose or filter. So decide how long to make the stub, and have it welded onto the manifold, then port the manifold out to continue the 24mm inside diameter all the way through it or otherwise maintain through shaping the approximately 452 sq. mm area all the way down to the cylinder. My particular manifold was built up around the outside with epoxy to give it plenty of thickness for porting, and in anticipation of using it for a mold to reproduce them, hence the butterscotchy color as shown in the picture.
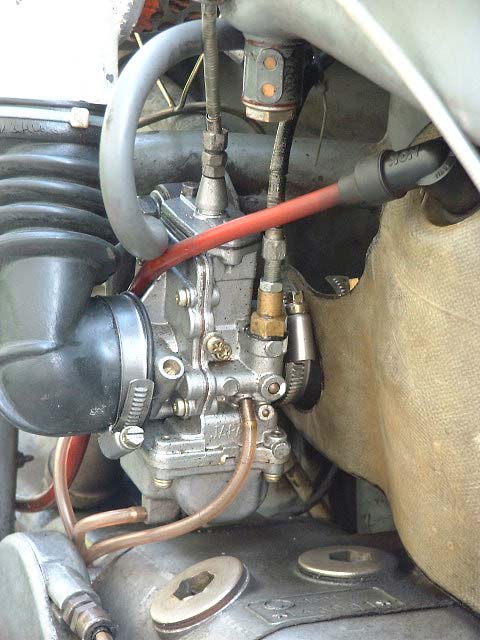
Alot of jetting work had to be done; I've got a different pilot, main, and needle installed than what comes with this carb when you go out and buy one. Overall, the carb as comes out of the box is too rich for this application. The next time I'm in there I'll list what's in it. I think that I've got it around 90% rightly jetted at this point.
 To figure exacly where to cut the intake hole in the fibreglass, bolt back on the new manifold, and install your new handufactured shroud half. Get a sharpie. Stare at where the hole goes until you can see the manifold through the fibreglass, then draw the circle on your fibreglass. Make sure to make the hole big enough to accomodate the OD of the rubber boot between the carb and manifold.
The throttle cable was made from bicycle cable stuff. Use .050 inner cable, buy about 7 feet of housing and run it through the scooter and cut to length as you see fit. Your cable needs a llittle ball end for the carb slide, and will need a barrel end for the handlebar throttle control. The choke cable is a standard LD piece with Mikuni choke cable conversion kit parts for the carb end. You'll need to reduce the diameter of about half of the choke plunger to allow it to be pulled up into the choke sleeve when activated. Lambrettas always need this modification. The air filter is a Lambretta GP200 airhose attached to a LI SIII or GP airbox neck, with a SIII air filter element and all the accompanying little parts necessary to allemble this. The air filter element is suspended (on the MK II) by some coathanger wires attached to the seatbolt nuts up underneath the frame. Care should be taken to keep the airhose from being folded closed depending on how the air filter is held or suspended.
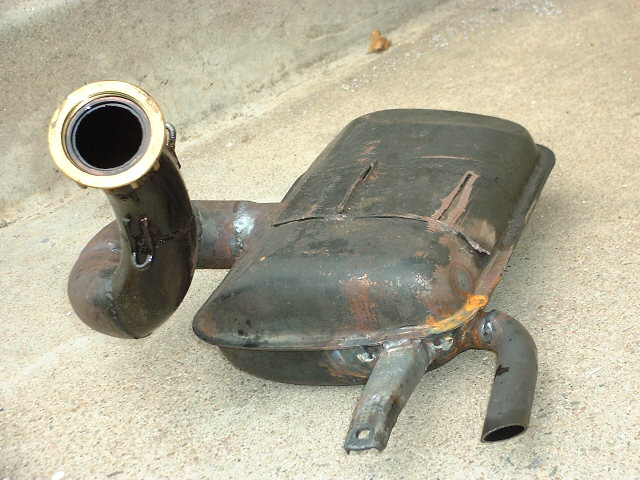

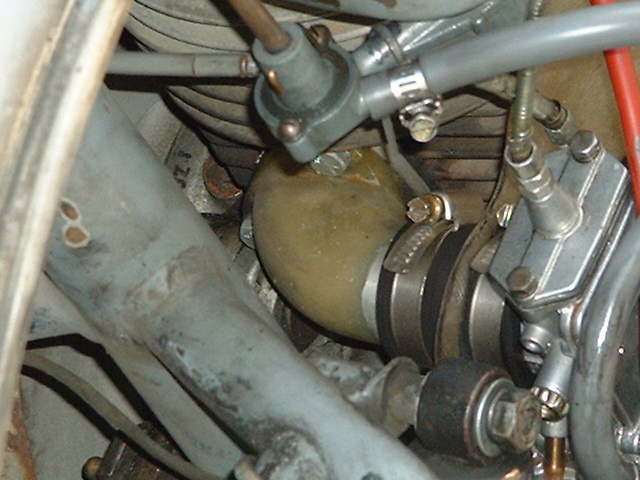
The muffler I'm using is an aftermarket version of a Vespa P125 muffler, a Sito or something. I had a good MK I LD muffler but I kinda got in a spot where I had to sell it. Subsequently I tried to find an LD muffler which would work but the ebay one I bought was a useless piece of trash (Bluemoon Scooters), the new and supposedly good-performing Italian reproduction I bought wouldn't even fit onto the motor, other repro units perform poorly and/or don't fit. I figured that the 50s-designed LD muffler was probably no more efficient than the 50s top-end design anyway so I tried something else entirely. I started with a Vespa P125 muffler and cut off the intake and exhaust pipes. The box was held in position so that the header pipe was on the left side of the bike and the little exhaust output was on the right. A bracket was formed and welded on to connect the box to the motor's mounting stud under the clutch. To make the header, first I got an LD muffler nut, the big brass one with the rippley things around the outside to turn it with. Then a sleeve was lathe turned to fit thru the nut and be held to the cylinder when the nut is tightened. Then with the nut and sleeve, and the muffler under the bike in place, successively larger diameter sections of various curved pieces were welded together to form a header from the cylinder downwards past the motor and frame then around the left side of and then into the muffler. For the exhaust, a little bent tube was welded on pointing rearwards.
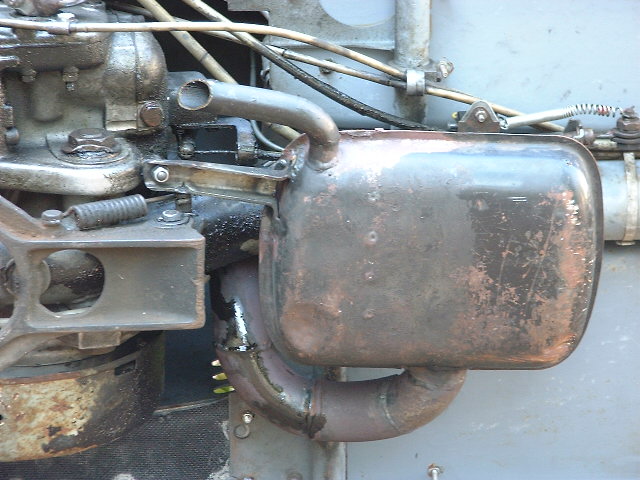 The P125 box goes good and it actually gives the bike a slight ''punch'' when it hits it's favorite mid-range rev, but it's kinda loud. I'm told that this is typical of aftermarket Vespa mufflers and Piaggio pieces are quieter. I'm going to have a Piaggio one built next.
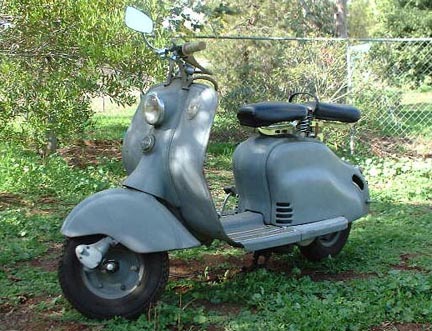
With the Mikuni carb and Vespa muffler on, performance was up. 1st gear now up to 25, 2nd gear now up to 35-40 typically, with one instance of 45. Top gear still has good uphill grunt, or you can go up most any hill at 35 in 2nd. Doesn't always go much above 45 if there's any headwind, uphill, or sitting upright. But crouch, or the slightest downhill, and the thing starts building speed and hits 50-55 without much trouble if you have the time and distance to let it. One time in a crouch I hit 60 and am sure I could do it again. Speeds like that though or hitting 45 in 2nd are really revving the motor, probably overrevving it. Don't do those speeds with lights on, you'll blow the bulbs from the excessive voltage. Fuel consumption is poor at about 42 m.p.g., largely due to the enthusiastic use of the throttle, it's hard not to use it 'cause it's so much fun to actually haul-ass around on the thing. With this set-up, the LD actually starts feeling pretty sporty for an old scoot, and it still looks totally stock
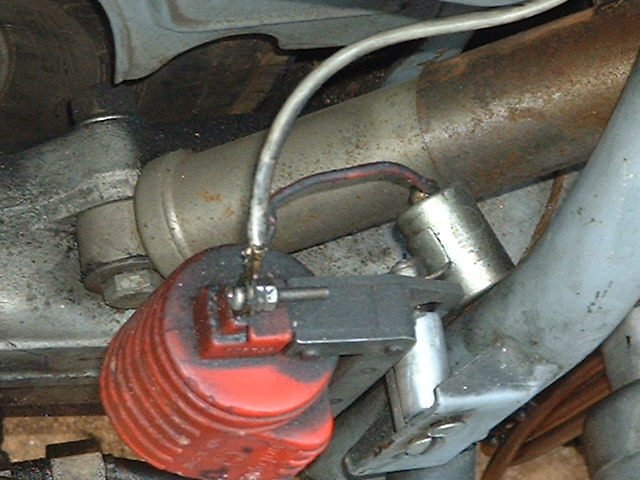
While I was taking pics I also shot one of the ignition coil. My LD has a Filso system on it and if one doesn't have a Filso ignition coil then a Serveta-Motoplat coil and condensor may be used instead. I've had mine on for a couple of years now with total success. I've mounted the condensor outside by the coil instead of within the stator, so if the condensor goes out it can be diagnosed and serviced/replaced much more conveniently.
As an update, the muffler's flanged collar which the big nut tightens down on seems to have broken. I think that the weight and vibration of the muffler sticking out forward the way it does and suspended just with the header and the one bracket allows stoo much vibration and bounce, resulting in the broken off collar. A more solid mounting needs to be devised, or the muffler needs to be mounted in a different way, or a different muffler needs to be used (I already have another one in mind).
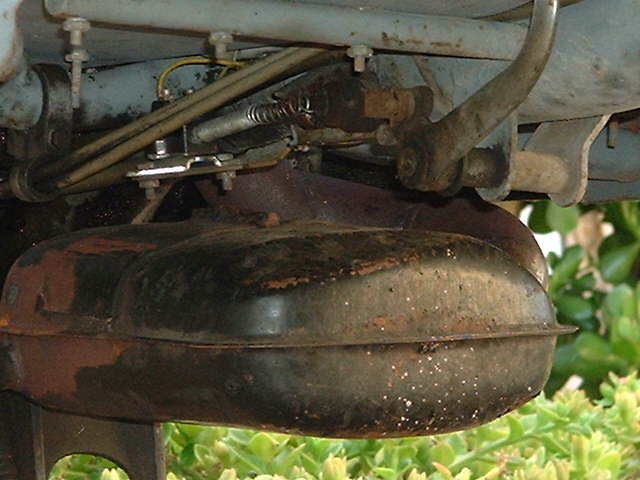
Next update; I got a used, medium condition kinda beat-up original MK III LD muffler and put it on. The bike ran well, and seemed a little smoother than with the vespa muffler, however it didn't rev like with the P125. This could be partly assigned to the LD muffler probably requiring a smaller main or other jets than the P muffler, though I left the P 125 muffler jets in, the motor didn't seem to clip off at the top as with too big a main jet, it just wouldn't rev as high. Good torque, though. I'm thinking that the P125 box just performs better. More tests to come.
|
torque to the top of the page |
wind it out to jonbretta home page |